타입스크립트와 함께 Vue3 시작하기

시작하기전에
nodejs를 사용하면서 불편했던 것은 타입을 명확히 알 수 없기 때문이었다. 그렇기에 타입스크립트를 사용하게 됬다. 서버쪽 구성(express 등) 타입스크립트를 지원했으나 Vue2의 경우에는 불완전한 타입스크립트로 인해 문제도 몇몇 있었다. 그러나 이번에 출시한 Vue3는 타입스크립트가 공식적으로 지원된다. tpyescript로 Vue3가 작성됬기 때문이다. 개인적인 생각으론 React보다 유연하고 타입스크립트 지원이 되서 편리할 것 같다.
Vue 기본프로젝트
Vue 기본 프로젝트를 만들고 리뷰하도록 하자
기본 환경 구성
Vue CLI가 있기에 기본 환경 구성은 매우 심플하다.
Vue CLI 설치
npm install -g @vue/cli
Vue CLI에서 프로젝트 생성
vue create vue-with-typescript
바벨, 타입스크립트, 린트 옵션을 선택했다.
# 옵션 선택

Vue CLI v4.5.15
? Please pick a preset: Manually select features
? Check the features needed for your project: Choose Vue version, Babel, TS, Router, Vuex, Linter
? Choose a version of Vue.js that you want to start the project with 3.x
? Use class-style component syntax? Yes
? Use Babel alongside TypeScript (required for modern mode, auto-detected polyfills, transpiling JSX)? Yes
? Use history mode for router? (Requires proper server setup for index fallback in production) Yes
? Pick a linter / formatter config: Prettier
? Pick additional lint features: Lint on save
? Where do you prefer placing config for Babel, ESLint, etc.? In dedicated config files
실행
npm run serve
샘플 코드 리뷰
기본적으로 생성된 코드를 간단히 리뷰해보자.
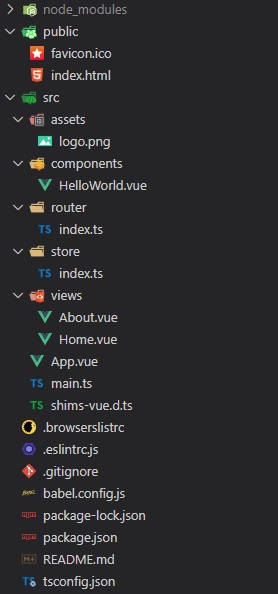
기본 폴더 구조
기본적인 폴더 구조는 Vue2와 거의 비슷하다.
pacakage.json
vue 관련된 라이브러리들이 추가되었다. 그 중에서 클래스 타입의 컴포넌트를 사용하기로해서 vue-class-component도 추가된 듯 하다. 그 외 eslint, prettier에 관련된 린트, 타입스크립트가 추가되었다.
{
  "name": "vue-with-typescript",
  "version": "0.1.0",
  "private": true,
  "scripts": {
    "serve": "vue-cli-service serve",
    "build": "vue-cli-service build",
    "lint": "vue-cli-service lint"
  },
  "dependencies": {
    "core-js": "^3.6.5",
    "vue": "^3.0.0",
    "vue-class-component": "^8.0.0-0",
    "vue-router": "^4.0.0-0",
    "vuex": "^4.0.0-0"
  },
  "devDependencies": {
    "@typescript-eslint/eslint-plugin": "^4.18.0",
    "@typescript-eslint/parser": "^4.18.0",
    "@vue/cli-plugin-babel": "~4.5.0",
    "@vue/cli-plugin-eslint": "~4.5.0",
    "@vue/cli-plugin-router": "~4.5.0",
    "@vue/cli-plugin-typescript": "~4.5.0",
    "@vue/cli-plugin-vuex": "~4.5.0",
    "@vue/cli-service": "~4.5.0",
    "@vue/compiler-sfc": "^3.0.0",
    "@vue/eslint-config-prettier": "^6.0.0",
    "@vue/eslint-config-typescript": "^7.0.0",
    "eslint": "^6.7.2",
    "eslint-plugin-prettier": "^3.3.1",
    "eslint-plugin-vue": "^7.0.0",
    "prettier": "^2.2.1",
    "typescript": "~4.1.5"
  }
}
.eslintrc.js
기본적인 린트 세팅이 잡혀있다. 정말.. 편리하다. 사용하다가 불편한 것은 일부만 수정해서 사용하면 될 듯 하다.
module.exports = {
  root: true,
  env: {
    node: true,
  },
  extends: [
    "plugin:vue/vue3-essential",
    "eslint:recommended",
    "@vue/typescript/recommended",
    "@vue/prettier",
    "@vue/prettier/@typescript-eslint",
  ],
  parserOptions: {
    ecmaVersion: 2020,
  },
  rules: {
    "no-console": process.env.NODE_ENV === "production" ? "warn" : "off",
    "no-debugger": process.env.NODE_ENV === "production" ? "warn" : "off",
  },
};
src/shims-vue.d.ts
vue 파일들의 타입을 정의한다.
/* eslint-disable */
declare module "*.vue" {
  import type { DefineComponent } from "vue";
  const component: DefineComponent<{}, {}, any>;
  export default component;
}
src/main.ts
가장 먼저 실행되는 소스 파일. Vue App 생성 후 스토어와 라우터를 등록한다.
import { createApp } from "vue";
import App from "./App.vue";
import router from "./router";
import store from "./store";

createApp(App).use(store).use(router).mount("#app");
src/App.vue
가장 먼저 출력되는 페이지다. 라우터 링크로 만든 네비게이션이 있고 라우터 뷰 부분에 해당 경로에 맞는 컴포넌트를 출력한다.
<template>
  <div id="nav">
    <router-link to="/">Home</router-link> |
    <router-link to="/about">About</router-link>
  </div>
  <router-view />
</template>

<style>
#app {
  font-family: Avenir, Helvetica, Arial, sans-serif;
  -webkit-font-smoothing: antialiased;
  -moz-osx-font-smoothing: grayscale;
  text-align: center;
  color: #2c3e50;
}

#nav {
  padding: 30px;
}

#nav a {
  font-weight: bold;
  color: #2c3e50;
}

#nav a.router-link-exact-active {
  color: #42b983;
}
</style>
src/router/index.ts
createRouter에서 실행하며 createWebHistory를 만들어서 history에 등록한다. routes는 RouteRecordRaw의 array 형태이다. 설정값은 기존과 크게 다르지 않은 것 같다.
import { createRouter, createWebHistory, RouteRecordRaw } from "vue-router";
import Home from "../views/Home.vue";

const routes: Array<RouteRecordRaw> = [
  {
    path: "/",
    name: "Home",
    component: Home,
  },
  {
    path: "/about",
    name: "About",
    // route level code-splitting
    // this generates a separate chunk (about.[hash].js) for this route
    // which is lazy-loaded when the route is visited.
    component: () =>
      import(/* webpackChunkName: "about" */ "../views/About.vue"),
  },
];

const router = createRouter({
  history: createWebHistory(process.env.BASE_URL),
  routes,
});

export default router;
src/router/store.ts
스토어는 Vue2와 완전 비슷하다.
import { createStore } from "vuex";

export default createStore({
  state: {},
  mutations: {},
  actions: {},
  modules: {},
});
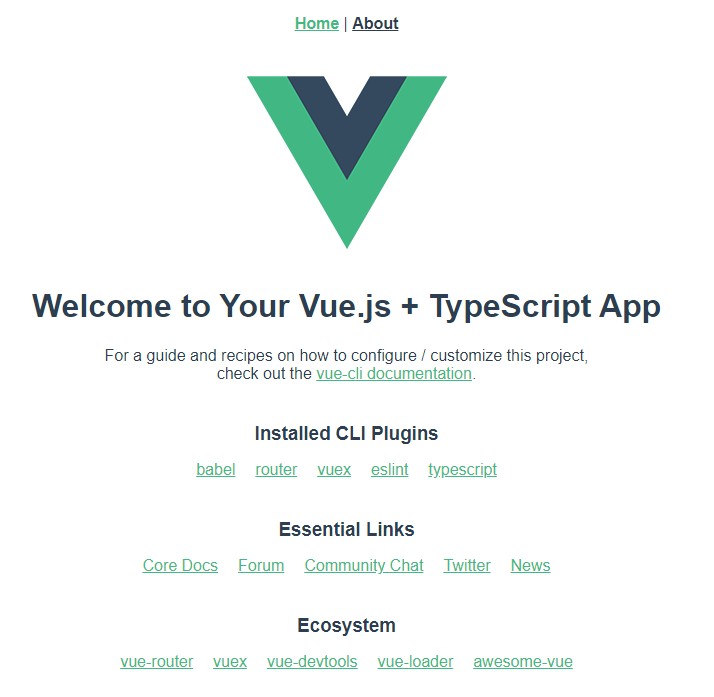
src/views/Home.vue
Home 클래스에는 created() 등 여러 함수나 변수를 사용할 수 있다. 그러나 다른 컴포넌트를 등록해서 사용해야될시엔 (components 옵션) Options 데코레이터에 작성해야한다. 물론 다른 방식(마지막에 알려드림)도 많다.HelloWorld 컴포넌트엔 props로 msg를 전달했다.
<template>
  <div class="home">
    <img alt="Vue logo" src="../assets/logo.png" />
    <HelloWorld msg="Welcome to Your Vue.js + TypeScript App" />
  </div>
</template>

<script lang="ts">
import { Options, Vue } from "vue-class-component";
import HelloWorld from "@/components/HelloWorld.vue"; // @ is an alias to /src

@Options({
  components: {
    HelloWorld,
  },
})
export default class Home extends Vue {}
</script>
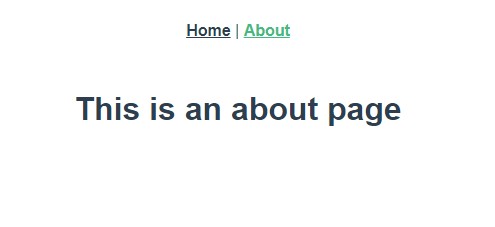
src/views/About.vue
단순 텍스트 출력이다.
<template>
  <div class="about">
    <h1>This is an about page</h1>
  </div>
</template>
src/components/HelloWorld.vue
프롭스를 옵션에서 정의하고 클래스에 msg 속성을 정의한다. (두번 작업해야된다..)
<template>
  <div class="hello">
    <h1></h1>
    ...생략
    </ul>
  </div>
</template>

<script lang="ts">
import { Options, Vue } from "vue-class-component";

@Options({
  props: {
    msg: String,
  },
})
export default class HelloWorld extends Vue {
  msg!: string;
}
</script>

<!-- Add "scoped" attribute to limit CSS to this component only -->
<style scoped>
h3 {
  margin: 40px 0 0;
}
ul {
  list-style-type: none;
  padding: 0;
}
li {
  display: inline-block;
  margin: 0 10px;
}
a {
  color: #42b983;
}
</style>
Vue Class Component에 대하여
Vue Class Component는 class 스타일로 Vue를 작성하기 위한 라이브러리이다. 다양한 사용법이 있어 아래의 공식 문서를 꼭 참조해야될 것이다. 어느 정도 숙지가 되면 빠른 개발을 할 수 있을 것으로 생각된다.
공식문서: Vue Class Component
마치며
이번 Vue3 타입스크립트 공식 지원은 Vue 생태계에 큰 발전이라고 생각한다. mixin과 상속을 사용하면 효율적인 개발이 가능할 것 이다. 또한 타입스크립트를 곁들인 Vue로 만든 라이브러리들은 큰 안정성을 확보할 수 있다. 혹시 타입스크립트를 사용해본적 없는 사람은 이번 기회에 사용해보면 좋을 것이다. 쓰다가 안쓰면 매우 불편하다. 역체감 최고!
Comments